How to Build a Sledding Hill
When the snow starts falling, do you have visions of sledding down a mountain so fast you feel like you are flying? Hills so steep and long that each run lasts longer than it takes to hike back up to the top? Do you have winter fantasies like that? Mine also has plenty of luscious hot chocolate, charming Alpine villages and the ringing bells of horse-drawn sleighs. Unfortunately, few of us live in the Alps and not everyone has a great sledding hill. Building snowmen and snow forts are fun. But, they just can’t compare to the excitement of sliding down the perfect sledding hill.
Don’t live near a great sledding hill? Maybe the roads are still closed? Why not build you own sledding hill? That’s what we often did.
All you need to make your own sledding hill is snow, water and some patience. A way to move large quantities of snow and having different types of sleds help too.
Sledding Hill or Sledding Ramp?
When we originally posted this article, we learned that there is a distinct difference between sledding hills and sledding ramps. Sledding hills are what we built when there was not an existing hill to slide down. A sledding ramp is a ramp, built in the middle of a sledding hill, that launches sleds like a ski jump.
The construction of hills and ramps are pretty much the same. This article focuses on building sledding hills. However, you could easily use our ideas when building a ramp.
Sledding Hill Construction
Basic Sledding Hill
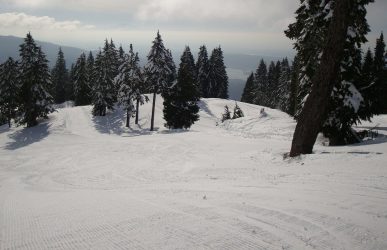
You can build sledding hills anywhere there is a fairly long run of smooth, uninterrupted ground. The basic idea is to build a ramp-like structure that can mimic a hill. This method requires moving the snow yourself to create a wedge-shaped mound of hard-packed snow.
Sledding Down a Flight of Stairs or the Front Stoop
If you have a set of stairs nearby, they might make a great sledding hill. Make sure they are not the only way to enter and exit your home and get permission before you begin. You’ll need enough snow and ice to protect the steps from sled runners or protect flat-bottomed sleds from being damaged by the steps.
Igloo Style Sledding Hill
If you have a lot of little hands helping to build a sledding hill, those igloo style blocks and children’s play buckets can work great. Stack, smush and shape rows of the blocks. It’s just like building a sand castle, only colder and without the sand. You could also use the blocks to create a staircase to the top of your sledding hill.
Turning a Snowbank Into a Sledding Hill
The easiest way to build your own sledding hill is to get someone else to start it for you. As a kid, I loved it when the snowplows came through – at least until I was the one shoveling the driveway. Snowplows meant snowbanks and snowbanks make great sledding hills.
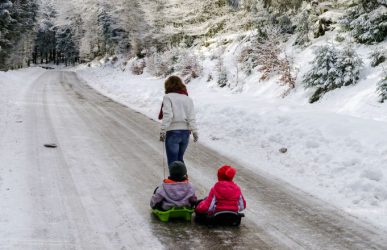
When we would sled down the street-side of the snowbanks, a parent or older children would be at each end of the sledding run to keep the rest of us safe. Shouts of “CAR!” meant get off the sled and get out of the street. Fortunately, the snow also kept most folks home and there was little traffic to interfere with our fun.
The far safer option was to find a snowbank that faced a long driveway or grassy area and slide away from the plowed road.
For best results in turning a snowbank into a sledding hill, use freshly plowed snow. Once the snow gets hard and chunky, it will be very hard to create a smooth gliding surface.
Tips on Moving Snow
Shovels are the obvious choice for moving snow. But, they don’t carry all that much and they can get very heavy after the 40th or 50th trip across the yard.
We found the best way to move snow for building sledding hills was a plastic tarp. Simply shovel, push or dump snow onto the tarp and then drag it over to the construction zone. The trick is finding that happy medium where you can carry the most snow without hurting yourself. And, make the tarp do double duty. Begin conditioning your sledding run each time you drag the tarp from one side of the yard to the other by following the same path. As an added bonus, the more you condition the path, the easier the tarp will travel across it.
We didn’t always have access to tarps, so we used the plastic toboggan sleds for snow transport. Tying a rope onto the sleds made it much easier to drag them across the yard.
Conditioning Your Sledding Hill
Rule # 1 of sledding hill building – don’t scalp the snow from the area around the ramp. You’ll get mud in grassy areas and an ice rink on paved ones if you remove too much snow. Always leave extra snow on paved surfaces to protect sled runners, plastic sleds and make for soft landings.
Conditioning a homemade sledding hill isn’t all that different than grooming a natural sledding hill. You’ll get far better results with freshly fallen snow. Snow doesn’t generally pack as well once it’s been on the ground for a few days.
We used plastic toboggan style or disk sleds to compact the snow and shape the ramp. By riding, pushing and shoving a loaded plastic sled down the face of our improvised sledding hill, we created a surface virtually guaranteed to provide hours of fun. If the snow was too chunky, sometimes we had to chop up some of the bigger pieces with a shovel. If the snow packed well, we could bring out the sleds on runners. When the snow stayed soft and powdery, we stuck with the flat-bottomed sleds.
Running a bit of water down the ramp makes an icier and a faster sledding hill. Be sure to fill in any holes and crevices with some loose snow. Go slowly with the water. You don’t want a slushy mess. You just want to pack the snow and create a slippery surface.
When we made snowbank sledding hills, we sometimes added a bit of snow back on the road to extend the length of the sledding run or make it a bit wider. Just keep in mind, putting snow back onto a plowed road can really get some folks upset.
Sledding Ramps
If you already have a great sledding hill and want to amp up the fun with a great sledding ramp, the concept is basically the same. Do be careful though when making a sledding ramp, one bad landing could lead to some serious pain.
Here’s a video that shows the idea. It’s a little rough around the edges but it shows and explains the concept of a snow ramp perfectly.
Building a Backyard Luge Run
Building a backyard luge run is a great option if you don’t have a long, straight yard. They are more work than just creating a sledding hill. But, you have more control on the path sledders will travel. Luge runs will also require deeper snow and may not always be an option.
This video shows how to remove snow to create the half-pipe section and how much fun a good backyard luge run can be.
Sledding Safety
Just a last reminder, the most important part of any sledding adventure is to play safely.
Making your own sledding hill should be all about the fun. Making sure everyone on the hill follows basic safety rules will ensure the day will end in smiles and dreams of tomorrow’s fun.